Chasing Waking Life: how my WebGL camera experiments became Lightdab
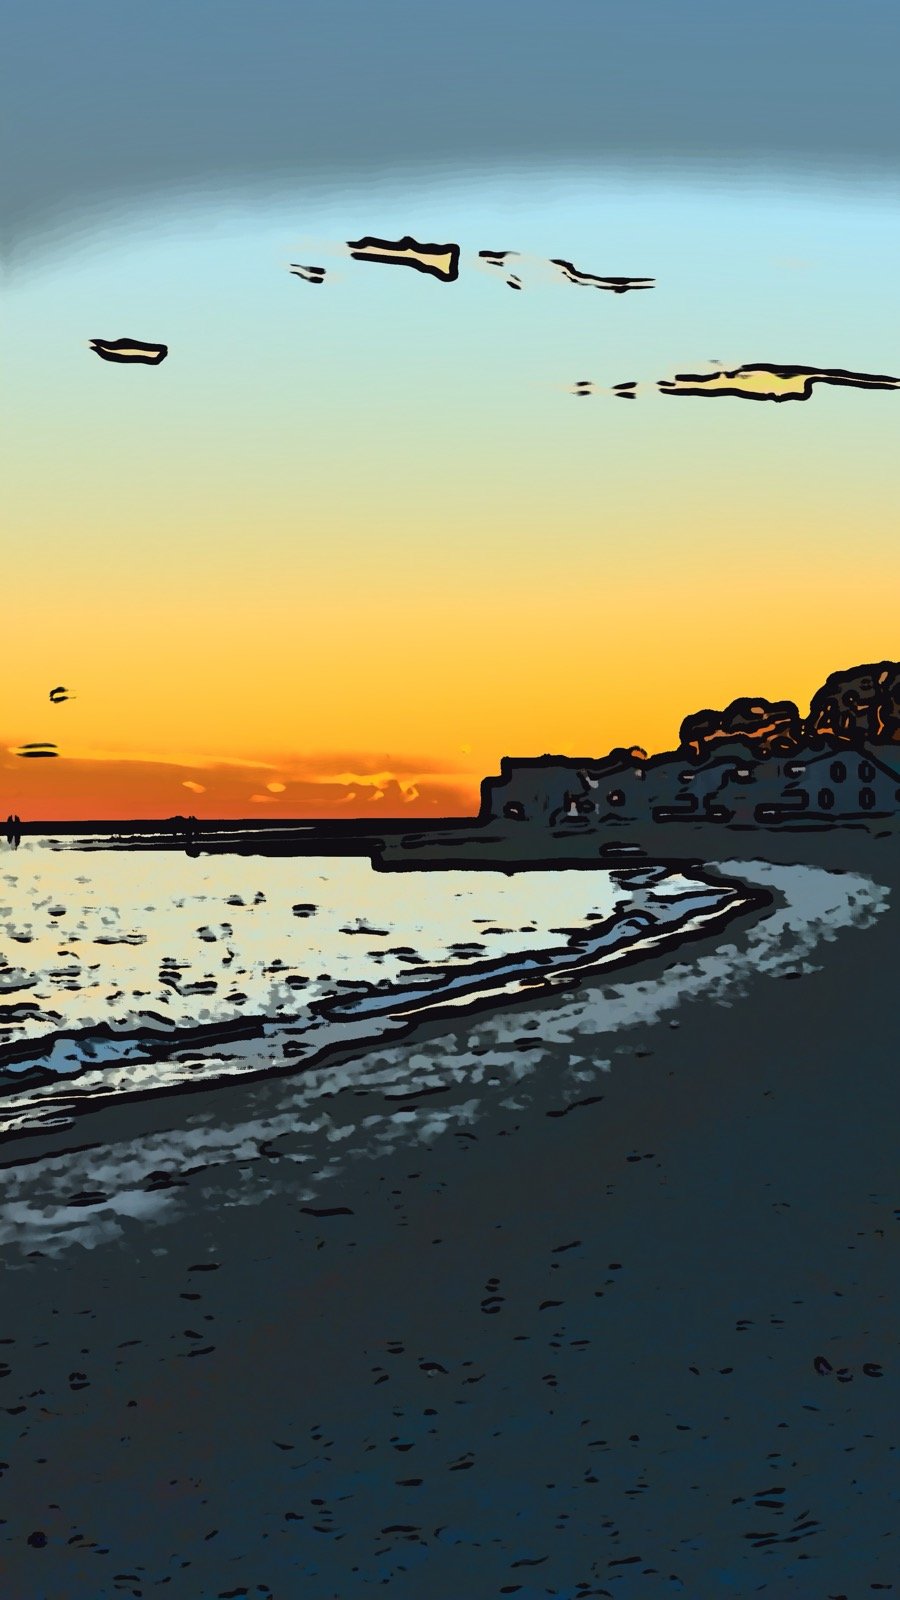
When I first saw Waking Life years ago, I was in awe of the filmmaking. Richard Linklater shot it as a regular movie, then animators drew over the footage, so real people walk and talk through a world that's been painted on top of ours. The cellshaded visuals stuck with me and I never forgot how that looked.
The picture above is a beach at sunset, taken with Lightdab, the camera app I just released. It's the closest I've gotten to that feeling. That movie is the reason I started messing with cel shading in the first place.
A window into a different way of seeing
Short of an awkward, heavy VR headset (and I don't want that thing on my head for long), the live camera on your phone is the best window there is into a world with an alternate perception. You point it at something ordinary and it comes back changed, while you're still standing there looking at the real thing.
That's what my camera experiments on this site have always been about. Dog Vision and Mantis Shrimp Vision guess at what other animals see. The 3D camera turns your feed red and cyan for old-school glasses. Lightdab is the same idea, pointed at paintings.
It started in the browser
In October, a cellshade experiment on this site grew into a whole collection of live camera effects in a web page. The camera feed comes in through the browser, each frame goes to the GPU as a texture, and WebGL shaders repaint it while the camera keeps running.
The core trick is a Kuwahara filter. For each pixel, it looks at the neighborhoods around it and favors the ones with the most even color. Texture gets simplified but edges stay sharp, so the picture stops looking like a photo and starts looking painted. (I made an interactive explainer of how it decides, pixel by pixel.) Add some flat bands of color and ink outlines from edge detection (I explained that part here), and you're most of the way to a cartoon.
My first version looked like Minecraft. I was using my phone as a viewfinder, and my own walls and windows came back as blocks. I assumed that was one bug. It was four: the shape of the filter's neighborhoods, hard edges between the color bands, a canvas drawn at a third of my screen's resolution, and a camera feed cropped down to a few hundred pixels across. One fix led to the next pretty quickly, and that debugging story gets its own post.
Why I went native
WebGL is actually really fast, even on phones these days. Speed wasn't the problem. The camera was. The web's camera API (getUserMedia) only gives you so much control, and I wanted more. A native app was the easiest way to get it.
That led to Swift and SwiftUI. SwiftUI felt familiar right away, since its programming model is a lot like React, which I use at my day job. And once you're writing an iPhone app that paints pixels, Metal is the obvious next step.
Graphics algorithms don't really care what hardware they run on, so the translation wasn't too bad. The Kuwahara shader came over almost line for line, and the work from the browser version carried straight into the app. Mostly I was learning a new library. (The nuts and bolts of the port get their own post.)
The hard part was trying things out
What took more work than I expected was actually trying things out. It's one thing to code up an algorithm and know how it should work in theory. It's another thing entirely to run it on a device, on live pixels, in your hand. What should look good mathematically doesn't always look good in real life, so a lot of the work was adjusting.
Watercolor is the best example, and a personal one: I've been painting watercolors myself for the last six months. My first version looked like a photo printed on plaster. It had texture, but it didn't look like paint. What fixed it was taking things away: lifting the darkest darks and toning down the paper. The way I got there was pointing the camera at real dark objects and judging what came back. There's no number for "looks like paint," so judgement and taste did the work. (That one gets its own post too.)
One bug I have to mention. The Pencil look blends a few frames together so the lines don't flicker. If you switched to another look, moved the camera, and switched back, the old scene would ghost into the new one, like two images superimposed on each other. I caught it at my desk, going back and forth between cameras. The fix was clearing that history whenever a look starts or stops. Ghosts gone.
What Lightdab is now
Lightdab has four looks:
- Ink & Color: flat color, bands, and ink outlines, with Anime, Comic, and Woodcut presets
- Watercolor: soft washes, uneven pigment, darker edges, and paper grain
- Sumi ink: brush strokes, ink bleed, and rice paper
- Pencil sketch: contours and hatching that follow the shapes in the picture
Tap the shutter for a photo, hold it for video, or bring in photos and videos you already have. Everything happens on your phone. These are brush, ink, and paper effects, not AI image generation.
My photos, not someone else's
The first version of the Lightdab website used stylized stock photos. It looked fine, but it felt like someone else's website and someone else's app. So I threw in my own photos from California and New York: Brooklyn rooftops, the Manhattan skyline, a lifeguard tower at sunset, palm trees, a trail at Lands End. All painted by the app itself. Now it feels like mine.
The bet I make now
Here's what changed for me. Before I open the app and pick a style, I make a little bet in my head about how the picture will come out. I'm usually pleasantly surprised. I look at a scene and I'm already seeing it painted.
I think that's the best thing a camera like this can do. The pictures are nice, but the bigger change is that I look at things differently before I even take one.
If you want to try it, Lightdab is on the App Store. Make your own bet before you shoot and see if it surprises you. The original experiments are still here on the site, free in your browser.